Excited to announce our new Sunshine Social embeddable widget for your site!
There is now a new icon in your sidebar to access the settings, you can choose up-to 5 flares for your widget. Then simply copy the embed code and add to your site and you are set!
View an example widget in the bottom right corner of our homepage: https://sunshine.social
If you want to customize your profile a bit more than the defaults, you can do so on the settings page.

When you register, we pull a few things for you... Profile Picture, Header Background and Short Bio. Feel free to change or update these items if you want something different than what you have on Twitter.
Your profile also has some SEO related content that you can change such as your page title, page description and open graph card. By default we populate these fields with some default information that we already know about you.

You also have some visual updates you can make to your profile, from here you can upload a custom background image, or go back and search for an Unsplash image. If you like, you can blur the background image so that it's less of a distraction behind your content. You can also remove the image completely.
When you remove the background image, we display a solid background color, you can change this color as you see fit. Keep in mind, collection titles are always white, so using a white background could cause issues.
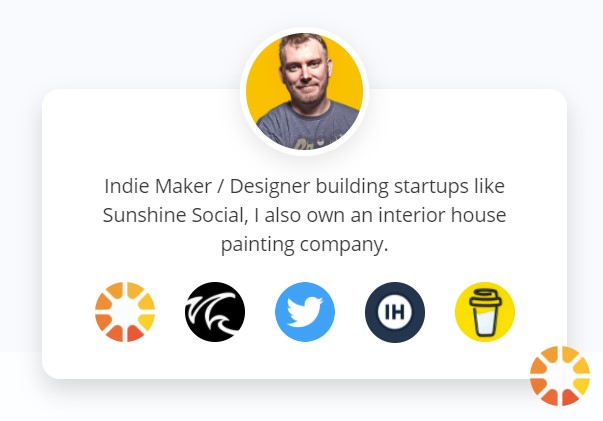
First off, a Flare is simple a link that you add to your grid as a "card". A Flare can link to any publicly accessible URL of your choice.
We provide 50 default flare types that you can choose from with a preset icon, accent color and sub-title. Default flares require either a username or an URL depending on they type of service you want to link to.
If you want to link to a custom URL, simply use our "Website / Link" flare type and update the settings accordingly.
As you can see below, for free profiles, these are the settings you can define per flare. (Title, Sub-TItle, Username or URL, Accent Color and Icon)

If you have a premium account, you can also add an image to make a larger more interesting flare.

To add a new Flare, simply click the "Add Flare" button at the top of the Grid, a panel will open up with a list of all the Flare types to choose from. The quickest way to find a specific flare is to search for it, if we don't have the option you need, add a "Website / Link" flare instead.

We have made registering and setting up your default profile as easy as possible.
1. Twitter Authentication We use Twitter as our authentication system to make it super fast to get started, secondly it allows users to get the username they are known for on Twitter. This prevents username squatting and no you cannot change your username.
2. Social Profiles After you have authenticated with Twitter, we take you to a page called "Social Profiles", here we list 11 different services that are common services to make it easy for you to quickly enter your username in for services you use.

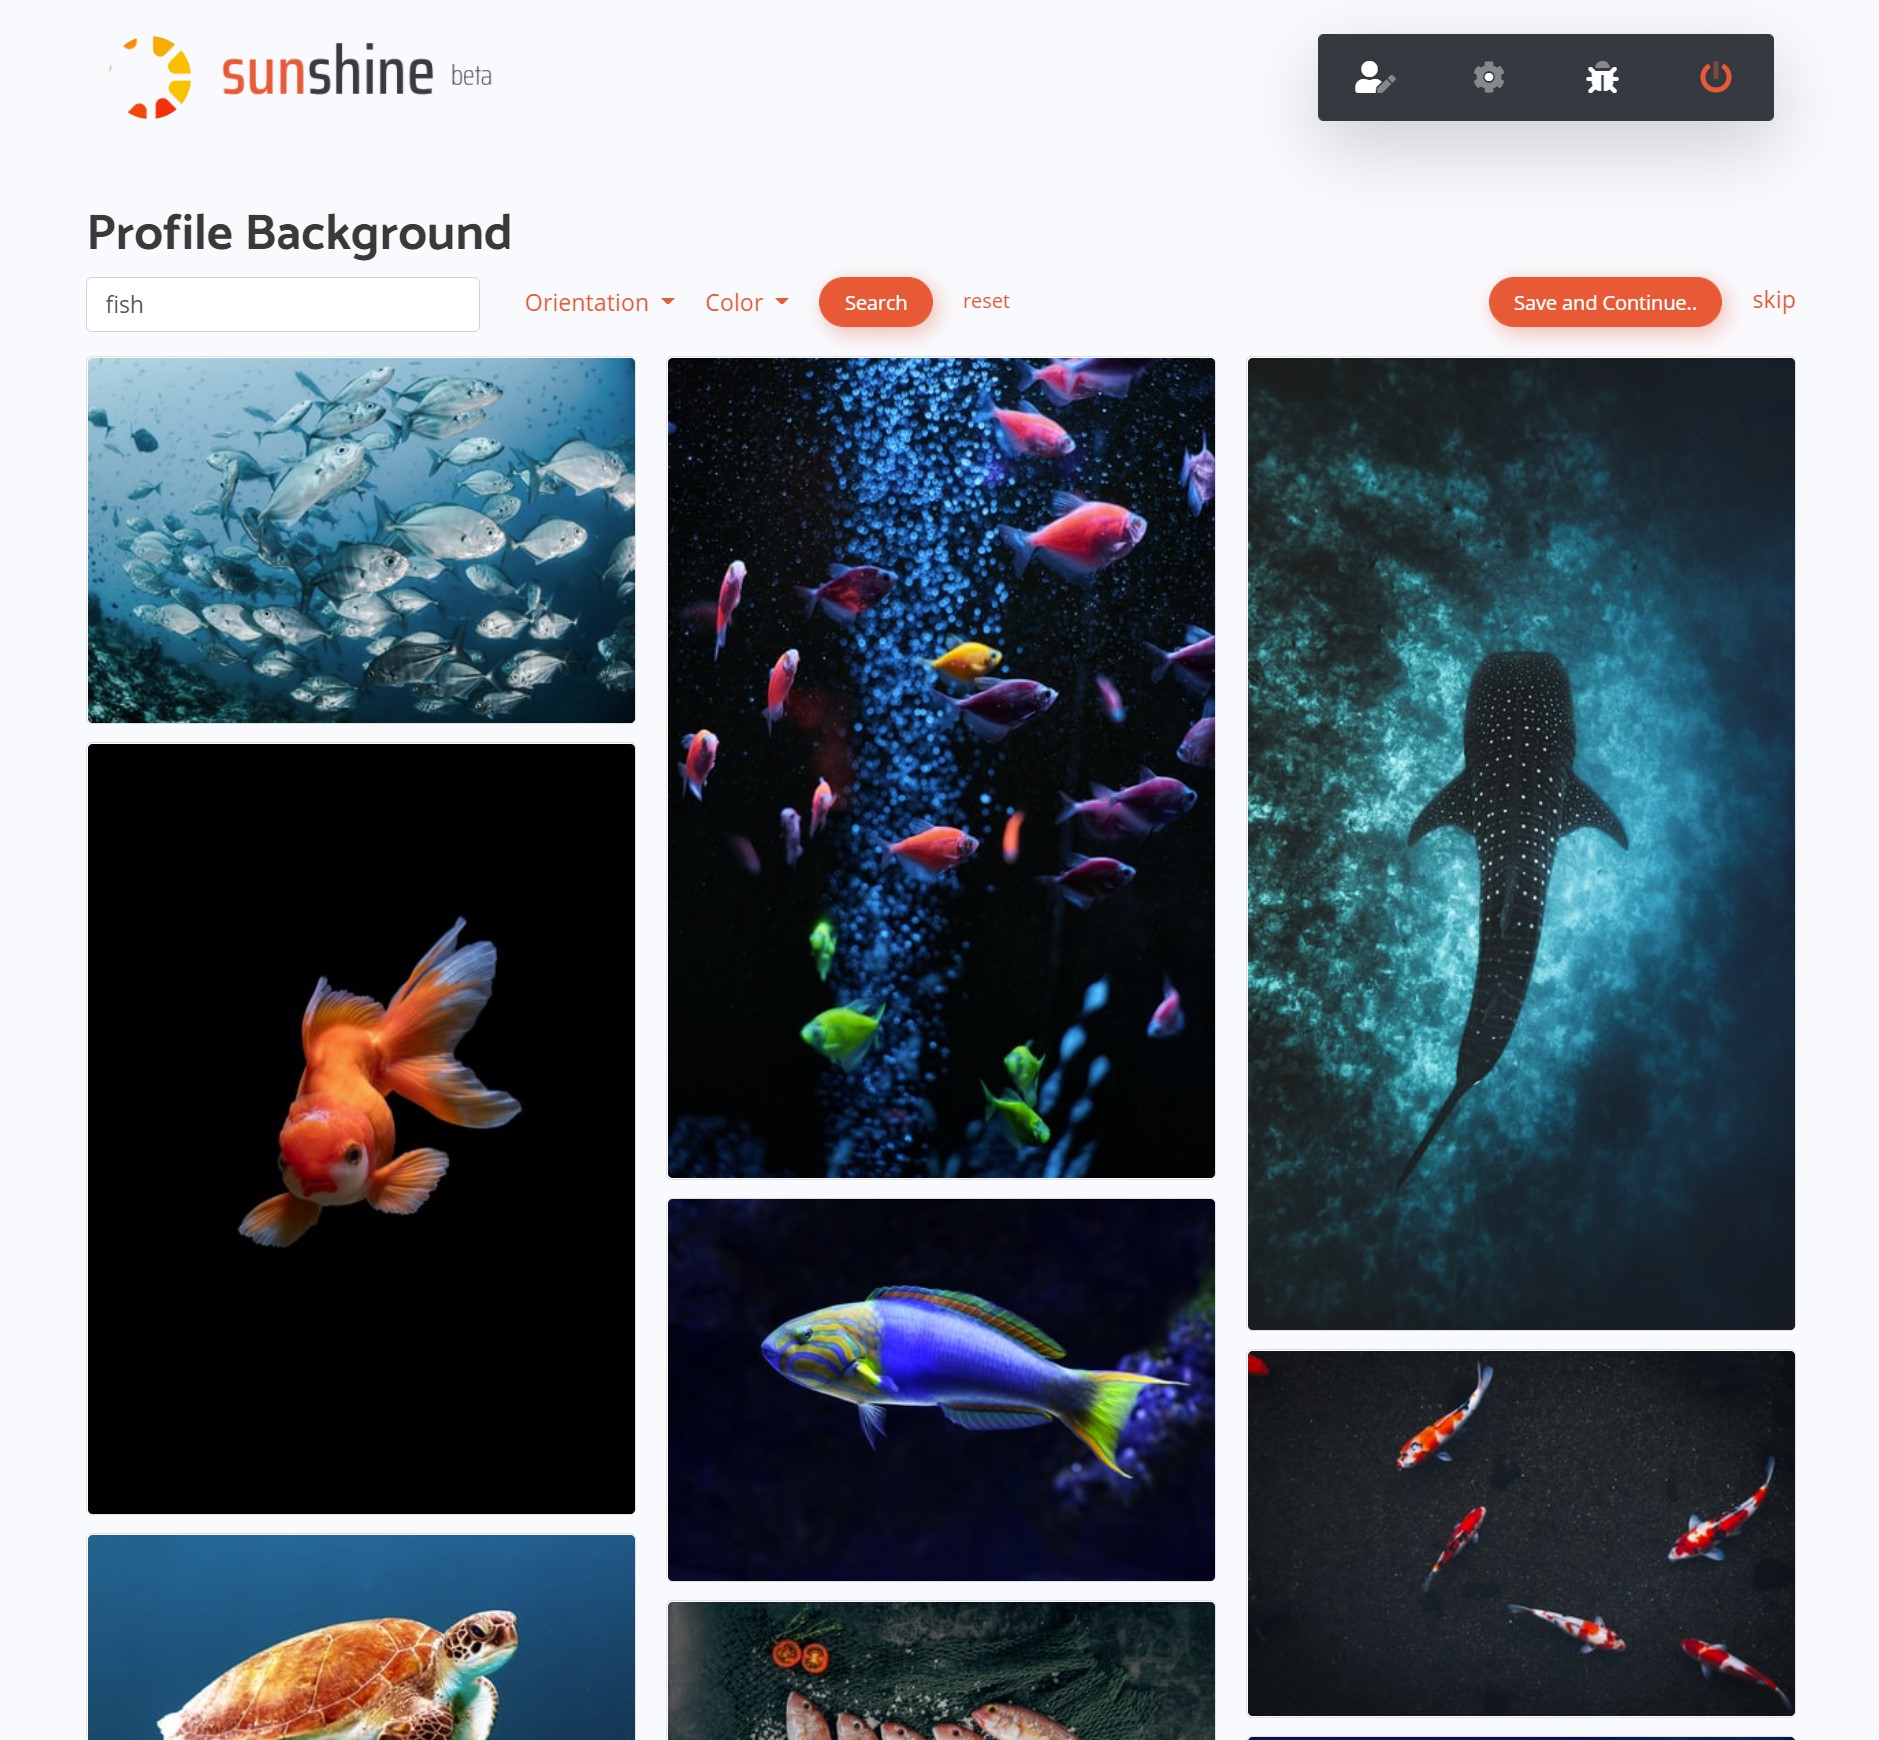
3. Profile Background After you have saved your Social Profile information, we take you to a page where you can search the photo service Unsplash to find a background image to use for your profile page.

If you do not want to add an image at this time, you can simply click "skip" and we'll add a default image for you that you can change later.
3. Flare Grid After you have set your background, you are then taken to your Flare Grid, this is your primary page and where you add all your links.
You'll notice, the Social Profiles you added earlier are added to your grid for you. You can now click the Gear icon to edit or delete the "Flare". If you click and drag a Flare, you can move it around the grid and place it wherever want.

In our next post, we will talk about how to add a new Flare, edit your settings and customizing your bio.
4. Collections By default, every user has one "Collection" or group of Flares. Premium users can add multiple collections to organize flares in a particular way.
Every collection has a title, by default the first collection is simply your username, when you are in edit mode, you can simply click on the title to change it if you want.

Due note, you cannot currently move flares between collections, you must add flares directly into the collection you want it in.
In approximately 8 hours we will be launching Sunshine Social on Product Hunt! We hope you will help support our goal of reaching the #1 position on Tuesday 04.20.21
We'll be posting additional content throughout the day, stay tuned!

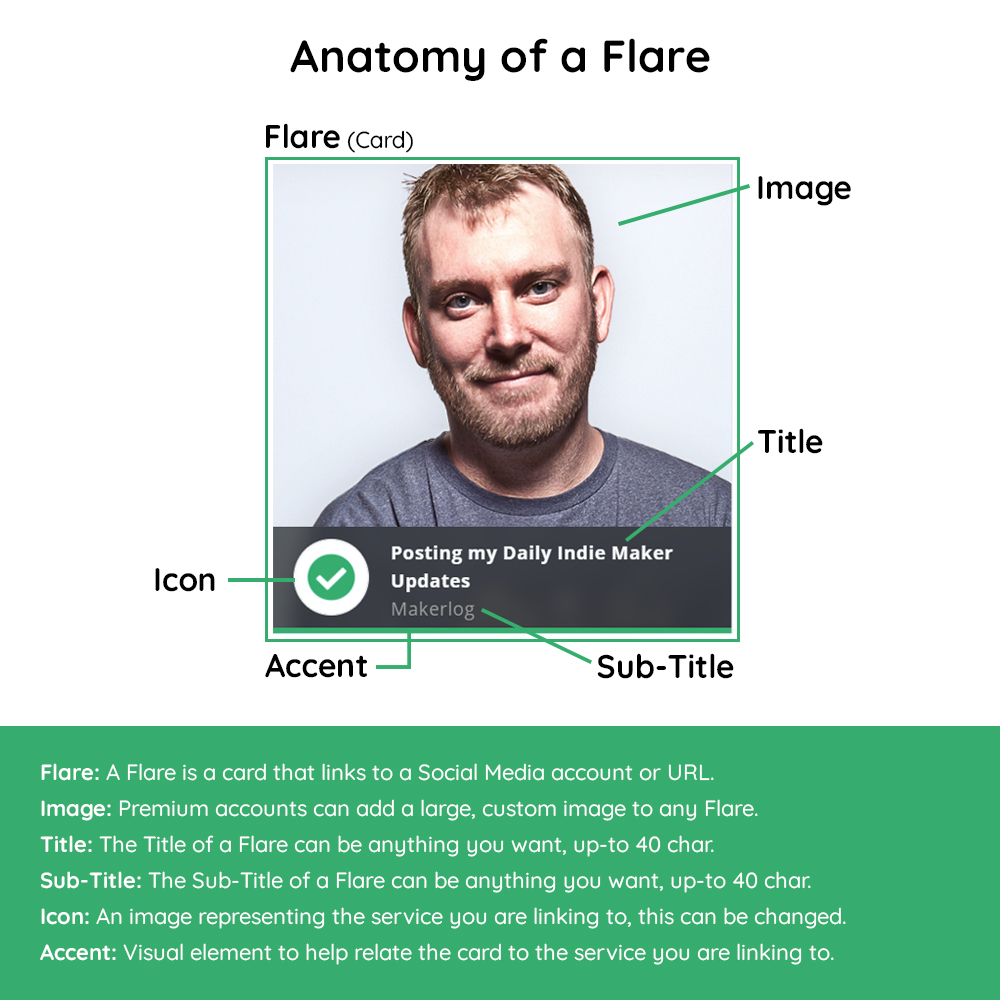
We talk a lot about "Flares" for Sunshine Social, but what actually is the anatomy of a Flare? We have 50 default flare types and you can add your own as well using the "Website / Link" type.
Our premium users can add a large image to Flares to make it even more unique. View the image below to learn more about Flares.
Flare: A Flare is a card that links to a Social Media account or URL. Image: Premium accounts can add a large, custom image to any Flare. Title: The Title of a Flare can be anything you want, up-to 40 char. Sub-Title: The Sub-Title of a Flare can be anything you want, up-to 40 char. Icon: An image representing the service you are linking to, this can be changed. Accent: Visual element to help relate the card to the service you are linking to.
Release Notes - 04.11.21 Excited to announce a few updates to Sunshine Social this week...
Interested in improving Sunshine Social? Let us know what kind of new features you'd like to see and we'll see what makes sense to build out for the next set of improvements.

Release Notes - 3.23/21
Today we pushed out some nice updates to Sunshine Social.
Custom Backgrounds from Unsplash: As part of our on-boarding process, you can now find a custom background image for your profile by searching the photo service Unsplash. Search for any term you wish, select an image you like and continue. It's a simple way to add some unique style to your page.
You can still upload a custom background if you wish from your settings page.
Updates to Journals: You can now edit a journal entry after it has been published, now you can fix those pesky mistakes.
Photos on journal entries can now be viewed larger by clicking on them.
Rather than only being able to link to your full journal, you can now link to or view individual entries by clicking on the "permalink" at the bottom of each post.
Tomorrow we'll be pushing out some more updates to Journals, plus updates to the homepage design to talk about some of the newest features.
We are excited to announce the launch of "Journals" to Sunshine Social!
Journals allow you to publish long form content to your profile, we encourage you to share life events that are important to you and interesting to your followers.
Currently, journals have basic functionality like adding a photo and emojis, but we are also working to add: edit entry, link to entry, open larger photo and more.
We wanted to get journals into your hands as quickly as possible so you could start adding interesting content to your profiles.
Feel free to reach out to us through our feedback form or a DM us through Twitter if you have any suggestions.
Happy Writing! 😊